First of all, why?
ISP micropublications are written in MyST Markdown, a markup language designed for scientific writing. In short:
It’s easy to learn: just markdown will get you most of the way there. MyST just adds some useful features.
The MyST ecosystem allows us to create both a PDF and a rich, interactive, shareable website from the same source.
For a more complete reasoning, check out Why MyST?
Roadmap
In this tutorial, we will:
Create a repository starting from a GitHub Template
Clone it on our machine
Install a Python distribution
Preview changes locally
Edit your article, and
Jump to sections that are relevant to you, and feel free to skip any if you’re confident.
Steps
To follow this, you’ll need:
A GitHub account: https://
github .com /login gitandghinstalled:gitinstructions,ghinstructions
Very basic git familiarity is required. For a simple overview, you can read the GitHub intro. We’ll only need clone, add, commit and push.
Using a GitHub Template
Github templates are like repository recipes. To write your scientific article, we’ll use one we prepared; it already contains all the configuration you need, and features a simple sample document for you to have a quick syntax reference. For a more detailed reference, see the MyST guide.
Navigate to https://
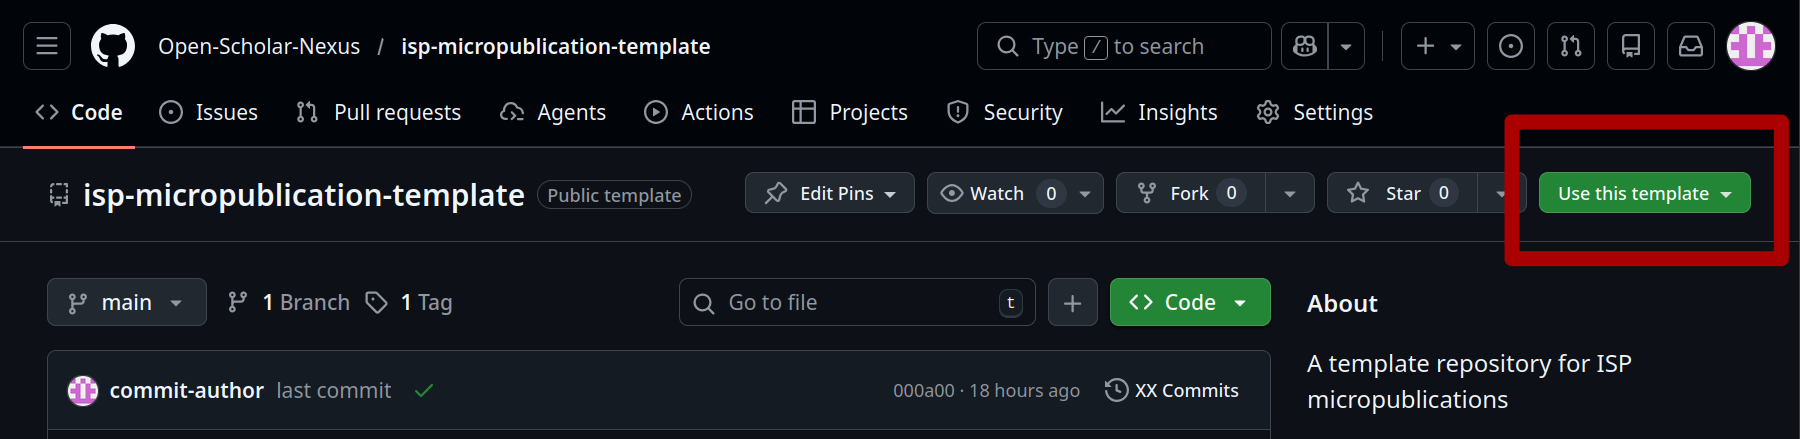
Once the repository is created, you’ll be taken to the URL of your repository. It will look like this: https://github.com/, followed by your username, and then your repository name. For this tutorial, let’s use https://github.com/octocat/smith-2022-how-to-ISP
Cloning the repo
If you have never used git before, we’ll need to authenticate you[2]. On Windows, use the terminal “Git bash” for terminal commands (it comes with git); for Linux and MacOS, use any terminal you like. The easiest way to set up authentication is to run gh auth login. Using ssh keys is more secure, but you will need to remember the password you set. You’ll be asked to open a link in the browser, and you’ll be authenticated. If you’d rather use a graphical UI, GitHub provides GitHub Desktop.
Once your git setup is complete, we’re ready to clone your repository. To do so, move to the directory you want to use, and use the gh repo clone command: gh repo clone octocat/smith-2022-how-to-ISP[3].
Installing a python distribution
Select the right version for your OS from conda
Installing MyST
Now, we’ll use the package manager we installed to get your environment ready to author. Move into the folder where you cloned your repository. The file environment.yml contains a “recipe” for the package manager to create an environment with all the dependencies (i.e. programs) you need. Read it: it’s short. Here’s how to create and activate the environment:
   mamba env create -f environment.yml
   mamba activate isp-paper
Next time you work on your paper, just activate the environment (mamba activate isp-paper) and you’ll be ready to go!
Previewing changes locally
First, let’s check everything’s working. From the repository directory, run myst start. After a small loading, you’ll get an update that looks like:
🔌 Server started on port 3000!  🥳 🎉


        👉  http://localhost:3000  👈
Depending on your terminal, you may be able to click on the link or might have to open it on your browser. That’s it! This will be your local testing environment. If you change something in your article, you’ll see the website update. You will also find the PDF version of your paper in the top right corner, under the download icon.
Editing your article
To edit your article, use any text editor you like. We suggest vscode: it’s well supported across platform, mostly open[4] and simple. The files you’ll have to edit are myst.yml, which contains metadata information about authors and content, index.md, which contains your paper. If you’re looking for a more complete authoring guide, read the official mystmd guide.
Deploying
To deploy your preview paper on the web, you will use GitHub pages. It’s a free service provided by GitHub to public repositories. To enable GitHub pages on your repository, navigate to your repo on GitHub, click on Settings->Pages and under “Source” select GitHub Actions[5].
Once you enable GitHub pages, on every push your website will be built and deployed.
GitHub, in its free tier, only allows public repos to use the GitHub pages service, which we’ll use for your deployment.
by “authenticate”, we mean enable the
gitrunning in your computer to access the websitegithub.com, and act as your profile.using
ghallows us to avoid explaining credentials in detail.yes, parts are not FOSS. the extension that provides
mystis not currently published on Open VSX Registry.since your
ghis already authenticated with GitHub you can run (substitute{owner}and{repo}with your username and the name of your repository):gh api \ --method POST \ -H "Accept: application/vnd.github+json" \ /repos/{owner}/{repo}/pages \ -f build_type="workflow"